Building a TWANG

Introduction
First…. Most of the credit must go to Robin Baumgarten and Critters for the inspiration and firmware. While I have hacked and tweaked the firmware a lot, the basic design is still all Critter’s. He did a great job.
A lot of people have asked me to help them build one, so this blog post is here to help them out. It is easy and fun to design and build your own parts and electronics. You can also either use my or Critters 3D printed parts.
The Electronics
The electronics are quite simple and only consist of a few basic pieces.
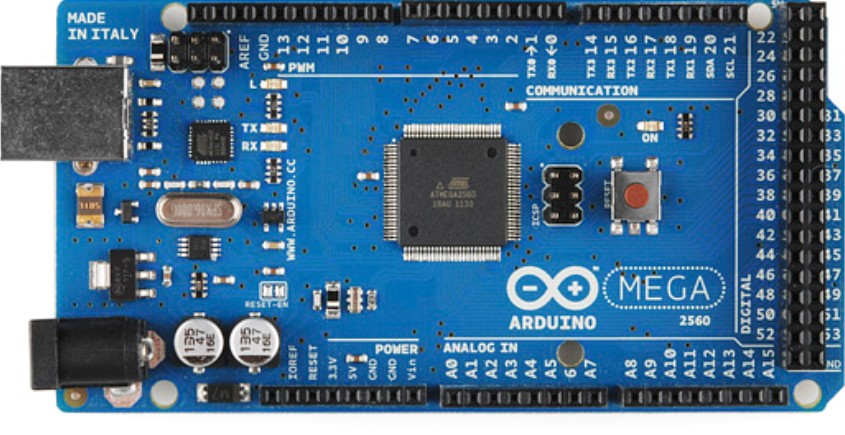
Arduino Mega – The firmware will not fit on an Arduino UNO, so you must use an Arduino Mega or anything using the the atmega2560 micro-controller. You can tpyically find a clone for less than $10.
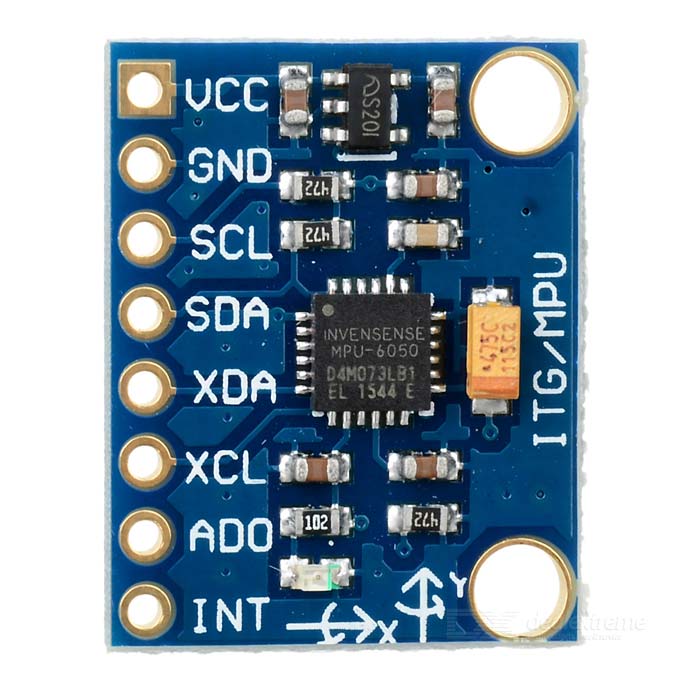
MPU-6050 – This is a 3 axis MEMS accelerometer and gyroscope. The easiest way is to buy a GY-521 breakout board. You only need to use the VCC, GND, SCL and SDA pins. Note: My shield also has the INT pin, but that was for experimentation. You can find these breakout boards on Amazon for less than $5.
Speaker – You need a small standard speaker. The sound quality is not great, so don’t invest in anything expensive. I used an 8 Ohm speaker, but anything should probably work. The speaker is hooked directly to the Mega I/O, so you also need a 100 Ohm resistor in the speaker circuit. Typically a 1/10w to 1/4w resistor would be used. Note: This resistor is included on my shield. If you use my 3D printed design you will want a 40mm diameter with very little depth to it. Note: Do not connect directly to an amplifier. It is not designed for that.

LED Strip – The FastLED library that is used, supports a lot of types. I like the APA102C (Dotstar) type. I have also tested WS2812 (Neopixel) types. Most of the testing I did was on a 1 meter 144 LED APA102C strand and it looked great. The game gets difficult when there are less LEDs, so I would recommend at least 90. I have also tested with (2) 1 meter 144/m strips soldered together and a giant 5 meter 90 LED/M strip. They all look and work great. The firmware supports up to 1000. Most longer strips are soldered smaller sections. It is easy to solder strips together like the image below. Be sure the 5V, Gnd, etc. are aligned the right way. I have some strips that are waterproof. That is not required, but does not hurt.
Note: Do not power the LED strip directly from the Arduino. Power it separately from a power supply. Note: My shield has an input for this. It will also power the Arduino.

Power Supply – Technically, you could need upwards of 40mA per LED. I bought a 10A supply and it has worked fine without getting hot up to 450 LEDs.

Life LEDs – The firmware supports remaining “life” LEDs. I prefer to use the main LED strip for this. It is fun to live within the limitations of the LED strip as the sole display. Using the strip also allows you to adjust the life count in firmware. The default is 3 lives per level, but I have boosted it to 5 for testing. Note: My shield uses different I/O pins for the LED than the original TWANG firmware, so you need to check this if using them.
Wiring
The image below shows all the required connections to the Arduino Mega. My prototype used male header pins poked into the Arduino headers. It worked fine, but wires did often pop out when removing the cover.

The TWANG Shield

While hand wiring is very simple, I found it to be messy and I worried about failures. I made a basic shield to clean everything up. Here are the features of the shield.
- LED Strip Terminal Block – It is very easy to hook up the strip. It works with both 3 and 4 wire strips. The power comes from the shield and no additional connections are required on the strip. Connections are clearly labeled. 3 wires LED strips do not use the CLK connection.
- Accelerometer Terminal Block: This has clearly labeled connections using the same names that are on the MPU-6050 accelerometer module. Just hook them up 1 to 1.
- Speaker Terminal Block: This also has 5V and Gnd if your hacking requires these connections. The 10 Ohm speaker resistor is mounted on the board.
- Main 5V power entry connector: This powers the LED strip. It also powers the Arduino. It uses a diode so you can also power the Arduino via USB for programming.
- Arduino UNO compatible: While the default firmware will not fit on an UNO, future compact version might be possible.
- Life LEDs – My enclosure does not use them, but you could wire some in. The resistors are included, but not the LEDs. You could solder LEDS on the board or remotely locate them and solder wires to the PCB.
Shield Source Files
The 3D Printed Parts and other hardware
You need to 3D print a bunch of parts, a door spring, some hardware and a little hot glue.
- Critters Files
- My Files – Best if you plan to use my shield.
Tindie Store
Typically I buy a small batch of PCBs for all my projects. If everything goes well I sell the rest on Tindie and often order more if they sell out.
- Just the assembled shield. (coming soon)
- A kit with all the custom parts
- Assembled Shield
- MPU-6050 wired and terminated with wire ferrules.
- Speaker wired and terminated with wire ferrules
- Door Spring

The Firmware
All of this is fully compatible with the original TWANG firmware. I forked the original and added a few changes. I would be happy to merge back to the original some time in future. The firmware relies on several libraries. Follow the instructions on GitHub pages to get those libraries.
Hacking the Firmware.
Hacking the firmware is quite easy. You should at least try editing some levels. More advanced hacking could improve the graphics and sounds. Please give feedback if anyone has made any improvements.
At a minimum you have to set the number of LEDs and the LED strip type in the firmware before compiling.
Video
(coming soon) This thing looks so awesome in person, but is nearly impossible to video due to the crazy brightness of the LEDs. A friend is going to help me try to get a decent video.
In the mean time, take a look at Critter’s videos.
If you want to be notified of future blog posts, please subscribe.


