TWANG!
I have been a Patron of Robin Baumgarten for a while. He makes experimental hardware for games. His Line Wobbler one dimensional dungeon crawler is my favorite and I have always wanted to play it. It uses a door stop spring as the controller. An accelerometer in the knob allows it to work like a joystick and also detect the wobble used to attack the enemies.

Original Line Wobbler (Robin B.)
After seeing his playable Christmas tree version of the game, I had to make one for myself. I could not find any source files that he published, but I was able to find an open source clone called TWANG. The game is quite fun and surprisingly challenging.

Original Twang Version
Electronic Hardware

Here is a list of the electronics hardware used.
- Arduino Mega. The Mega is way overkill for the I/O requirements, but an UNO does not have enough memory.
- MPU-6050 3 Axis Accel/Gyro Breakout Board. These are available for about $5 and have good library support for Arduino.
- Small Speaker. I bought a pair of external PC speakers at Micro Center for $4 and pulled out some 2″ speakers. You need to use a 100 Ohm resistor on one of the wires.
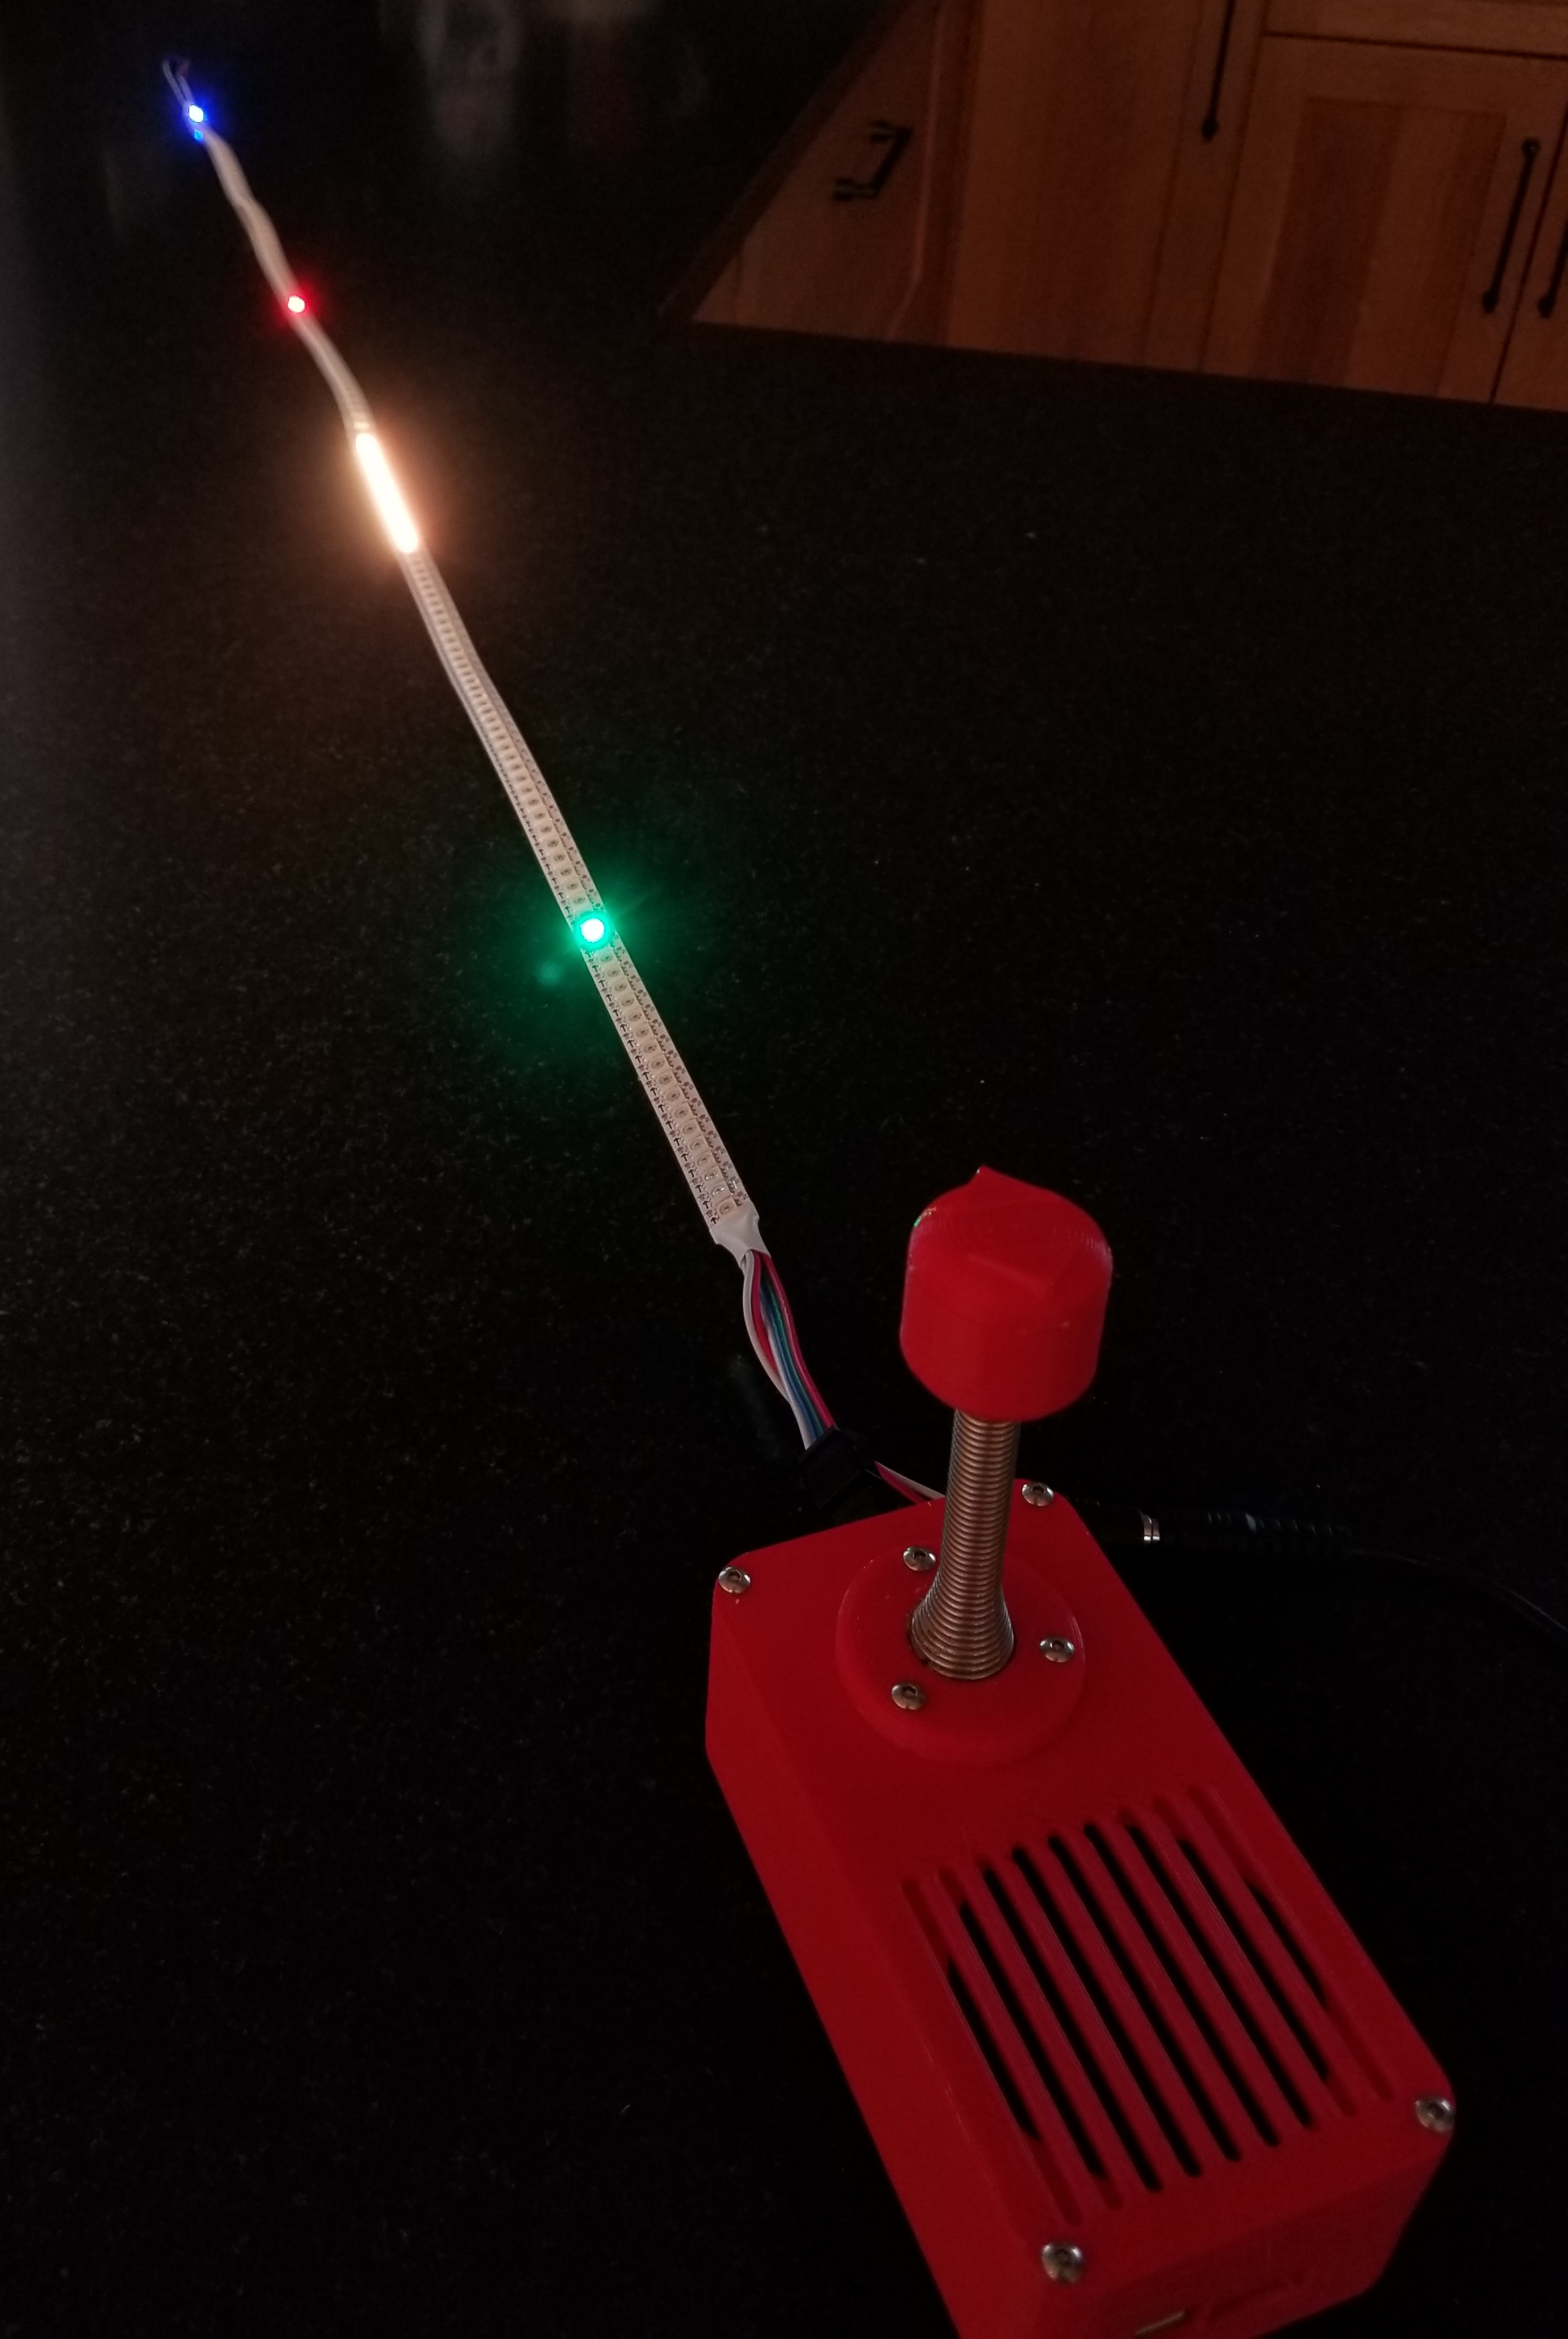
- RGB LED Strip: The default code is written for the APA102 type strips. The FastLED library used also supports the cheaper WS2812 (Neopixel) strips. I used a 144 LED 1 meter APA102 strip. The Clock and Data type strips can work faster and they typically have an overall brightness factor that gives them a more useful brightness range than Neopixels. The brightness of these strips is insane and you typically run them at about 1/2 brightness.
- Life LEDs: You can use 3 individual LEDs to indicate the number of lives you have left. I decided to skip that. I preferred the simplicity of a signal display element. I added a game over animation to the game to make it more clear that you are dead, dead.
Printed Parts

I created my own 3D printed parts. I was having trouble with the TWANG Thingiverse files. They are OBJ files and the parts are grouped. Cura was not creating good prints. My speaker was not going to fit anyway.
- Chassis: I made a heavy walled enclosure to give it a little weight and make it extra strong.
- Cover: The cover is also very thick. The speaker mounts in a pocket and is attached with hot glue.
- Spring Clamp. This holds the spring to the cover securely. I also added a little hot glue to prevent it from rotating.
- Knob Base. This is very similar to the official TWANG version. It has a longer, threaded interface to grab the spring. This parts takes a lot of abuse.
- Knob Top: Snaps on, but also gets a little hot glue.
The Firmware
The firmware is well written and pretty easy to follow. You need to download a lot of libraries. Some can be installed from the Arduino IDE and some must be downloaded manually. This is pretty well explained on the Github page.
Everything works on a 60 frames/second loop. This includes the display and the sound. I was able to tweak a few things easily and add a game over animation.
The levels are very easy to edit. You really don’t need to know how to program. I tweaked a few to make them easier for beginners.
Assembly
Build Spring Assembly
- Solder wires to the accel module.
- Slide the spring clamp over the spring.
- Assemble the knob to the spring top.
- Feed the wires through the knob base and spring.
- Screw the module to the knob base.
- Attach the knob top to the knob base.


Attach Spring to Cover (make sure spring stays vertical when attaching)
- Adjust the metal spring base until the spring stands vertically.
- Put a little bead of hot glue in recess on the cover
- Feed the wires through and place the spring in the recess.
- Put a little hot glue around the spring where the clamp goes. Screw it down.

Attach Speaker to Cover
- Blah
- Attach some wires. Put a 100 Ohm, 1/4W inline on one of the wires.
Assemble Base
- Install the Arduino Mega into the base with screws.
- Connect all the wires per the graphic below. I wired the accel SCL/SDA at the left end, but you can also wire them to pins 20 & 21 at the right end.
- Attach Cover


Usage
- You need to power the LED strip with a separate 5V power supply. I used a 10A supply for my 144 LED strip.
- You also need to power the Arduino. The easiest way is to do it via the USB port. You could wire the power supply in the first step to the 5V on the Arduino, but be careful to never power from the power supply and the USB at the same time or something will likely break.
- Note: I have been hooking up the LED power first. When I only power the Arduino, I see some flickering of LEDs. That concerns me that it is drawing some power from the I/O pins.
Next Steps.
- Make it Easier to Build: The wiring is a pain and probably not too durable. I used pins crimped into connectors that mated to the Arduino Mega. To make it easier I designed a little shield with screw clamps. It will also power the Arduino through a diode that will allow the USB to also be used. The speaker resistor is part of shield. It is also compatible with an Arduino UNO, so a pocket sized TWANG might be possible. That arrives next week. I will likely sell the extras on Tindie.
- ESP32 Version: I would really like to try this. The sound and speed should be better and the ability to network with another player sounds cool. It is also smaller and cheaper.
- Scoring System: Everyone want to compete.
Video
Here is a video of the Twang.
If you want to be notified of future blog posts, please subscribe.


Hey neat! I saw Line Wobbler years ago but there’s no chance of it appearing anywhere near me, so was hoping someone would write a DIY version.
Are your firmware mods and 3D printable case files available anywhere?
Cheers!
Yes,
It will be available within a few days. I am just waiting to verify the fit of the speaker. I used an odd size for the prototype and am switching to an easier to get and low cost version. Please check back or subscribe to blog to be notified.
Thank you, I would also like your case files. I already printed and completed this project but could always use another one. It was a quick but fun build.
I have more recent blog post with all the source files.
http://www.buildlog.net/blog/2018/01/building-a-twang/
Superb blog! Do you have any helpful hints for aspiring writers?
I’m hoping to start my own blog soon but I’m a little lost on everything.
Would you propose starting with a free platform
like WordPress or go for a paid option? There are so many options out there that I’m completely confused ..
Any recommendations? Thank you!
I spend about 0% of my time thinking about my blog platform. I don’t consider myself a blogger. I am a maker/creater that likes to share my work. WordPress fits me perfectly.