will1384's Ord Bot Hadron
I had wanted a 3D printer for years, but never had the money, last year I had saved up and got a Shapeoko 2, then I started saving up money and getting the parts to enlarge and upgrade the Shapeoko 2, last month I decided to try 3D printing with the Shapeoko 2, and it went better than expected, I posed about it over in the Shapeoko forums :
http://www.shapeoko.com/forum/viewtopic.php?f=5&t=2501&start=40
After trying 3D printing, I knew wanted a 3D printer, and because I had a lot of parts saved up for the Shapeoko 2 upgrades, I decided to make a Ord Bot.
Here are the parts I started with:
(004x)---NEMA17 Stepper Motor - KL17H248-15-4A ---- automationtechsinc.com
(003x)---Makerslide 330mm ------------------------------ automationtechsinc.com
(001x)---Makerslide 420mm ------------------------------ automationtechsinc.com
(001x)---Z Lift Plate Left and Right --------------------- automationtechsinc.com
(100x)---M3x0.5x4mm Socket Head Cap Screw -------- amazon.com * Had got for the Shapeoko 2.
(100x)---M3x0.5x6mm Socket Head Cap Screw -------- amazon.com * Had got for the Shapeoko 2.
(100x)---M3x0.5x45mm Socket Head Cap Screw ------ amazon.com * Used for Stepper Motor
(100x)---M5X0.80 Hex Lock Nut ------------------------- amazon.com * Had got for the Shapeoko 2.
(100x)---M5x0.8x6mm Button Head Cap Screw --------amazon.com * Had got for the Shapeoko 2.
(100x)---M5x0.8x8mm Button Head Cap Screw --------amazon.com * Had got for the Shapeoko 2.
(025x)---M5x0.8x12mm Button Head Cap Screw -------ebay.com * Had got for the Shapeoko 2.
(025x)---M5x0.8x30mm Button Head Cap Screw ------ ebay.com * Had got for the Shapeoko 2.
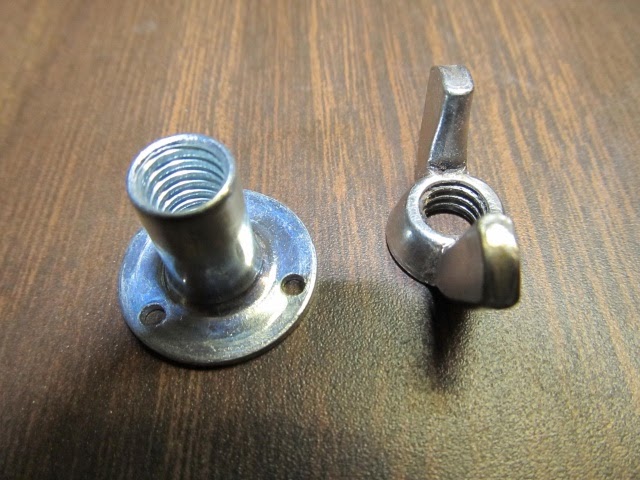
(001x)---M8x1.25x1000mm Threaded Rod ------------- ebay.com * I cut two 245mm sections from the 1000mm.
(200X)---Nuts For HFS5 Extrusions - HNKK5-5 --------- us.misumi-ec.com * Had got for the Shapeoko 2.
(001x)---HFS5-2040 1524mm Extrusion ---------------- us.misumi-ec.com * Cut to 370mm, had got for the Shapeoko 2.
(016x)---OpenBuilds Dual V Wheel Kit ----------------- openbuildspartstore.com * Had got for the Shapeoko 2.
(008x)---Eccentric Spacers ------------------------------ openbuildspartstore.com * Had got for the Shapeoko 2.
(002x)---Smooth Idler Pulley Kit ------------------------ openbuildspartstore.com * Had got for the Shapeoko 2.
(004x)---Universal L Brackets - Double ---------------- openbuildspartstore.com * Had got for the Shapeoko 2.
(004x)---Universal L Brackets - Single ----------------- openbuildspartstore.com * Had got for the Shapeoko 2.
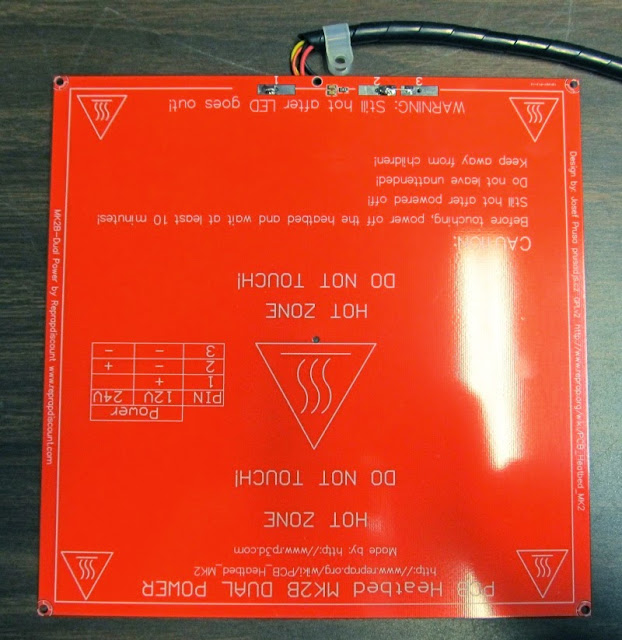
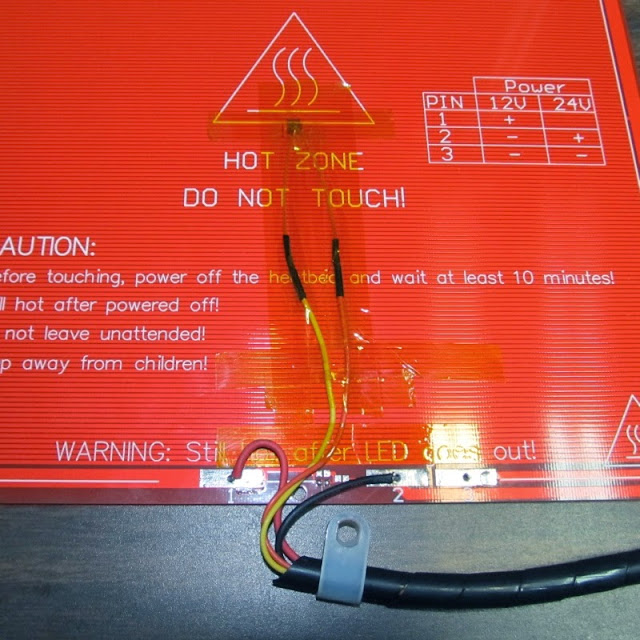
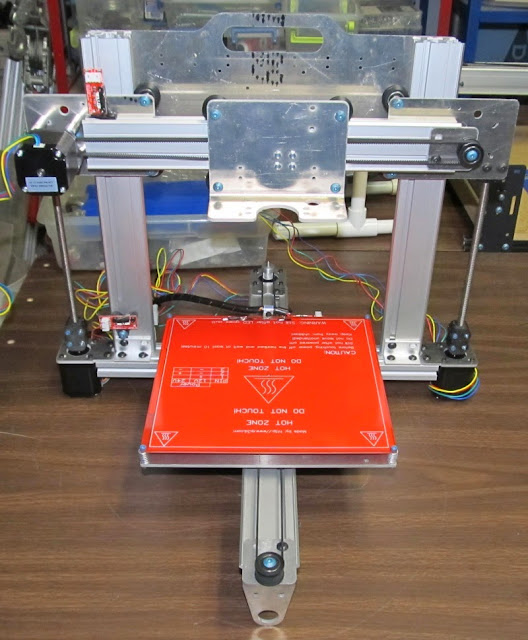
(001x)---RioRand Heated set - MK2a, with glass------ amazon.com
(012x)---ACCO Binder Clips, Medium ------------------ amazon.com
(001x)---Ord Bot Hadron Build Plates ------------------ ebay.com
(001x)---RAMPS 1.4 kit, has Mega and drivers -------- ebay.com
(010x)---JST Connectors - M/F Pair - 4 Wire ---------- ebay.com
(008x)---Heatbed Leveling Springs --------------------- ebay.com
(001x)---MBE Extruder v9 - 12v heater ---------------- quintessentialuniversalbuildingdevice.com * Working well with mods.
(010x)---Aluminum Spacers 0.1250 inch -------------- inventables.com * Had got for the Shapeoko 2.
(020x)---Aluminum Spacers 0.2500 inch -------------- inventables.com * Had got for the Shapeoko 2.
(010x)---Aluminum Spacers 0.5000 inch -------------- inventables.com * Used for Stepper Motor, had got for the Shapeoko 2.
(020x)---Aluminum Spacers 1 inch -------------------- inventables.com * Used for Stepper Motor, had got for the Shapeoko 2.
(003x)---Mechanical End Stop v1.2 -------------------- ebay.com
(003x)---2m of GT2 belt with 2 GT2 Pulleys --------- ebay.com * used only about 4 foot, or 1.2 meters, had got for the Shapeoko 2.
I also decided to get this:
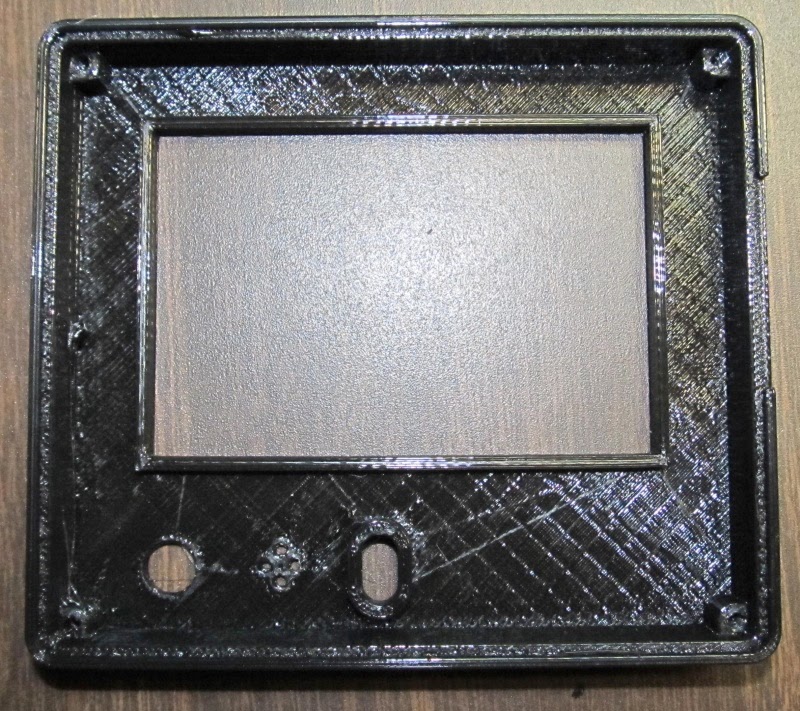
(001x)------Full Graphic Smart LCD Controller----------- ebay.com
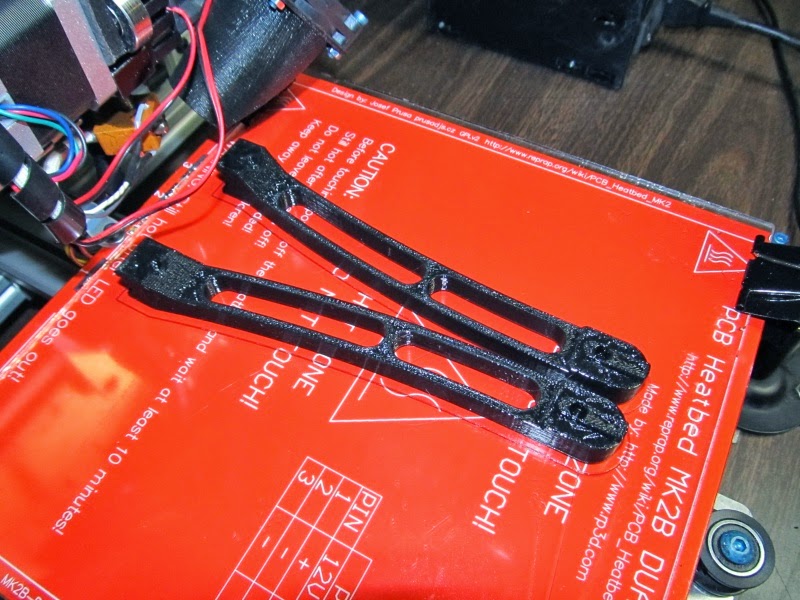
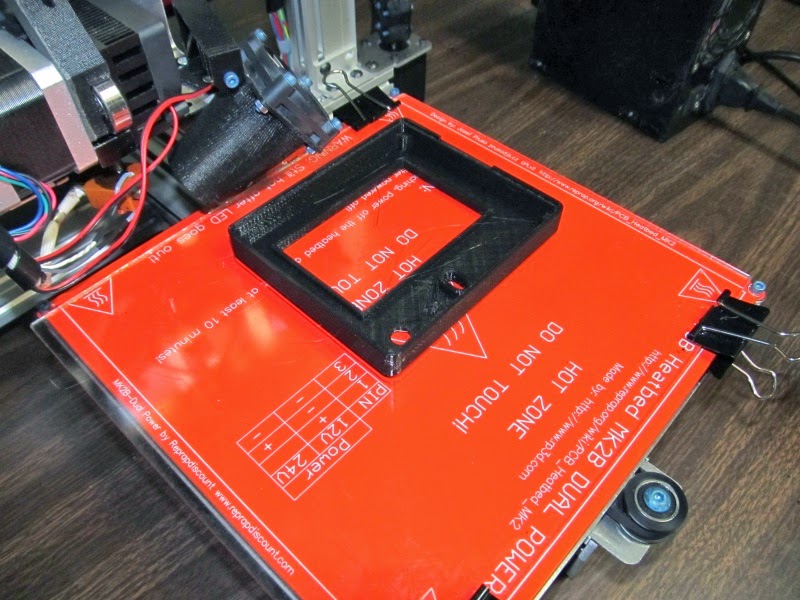
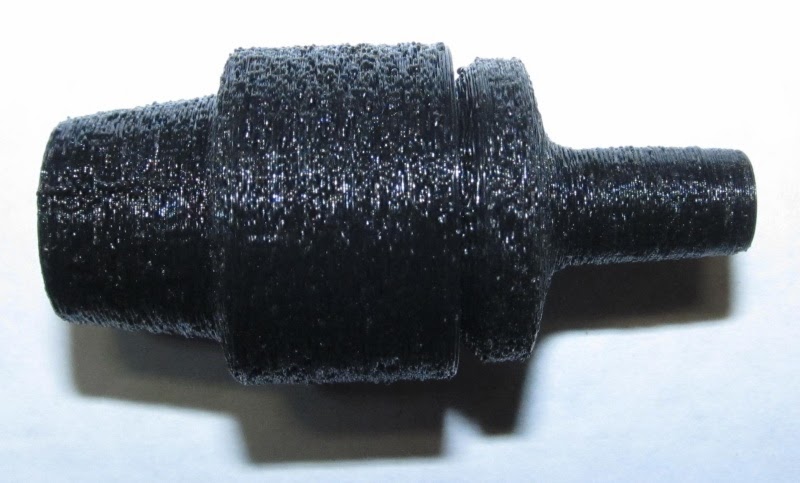
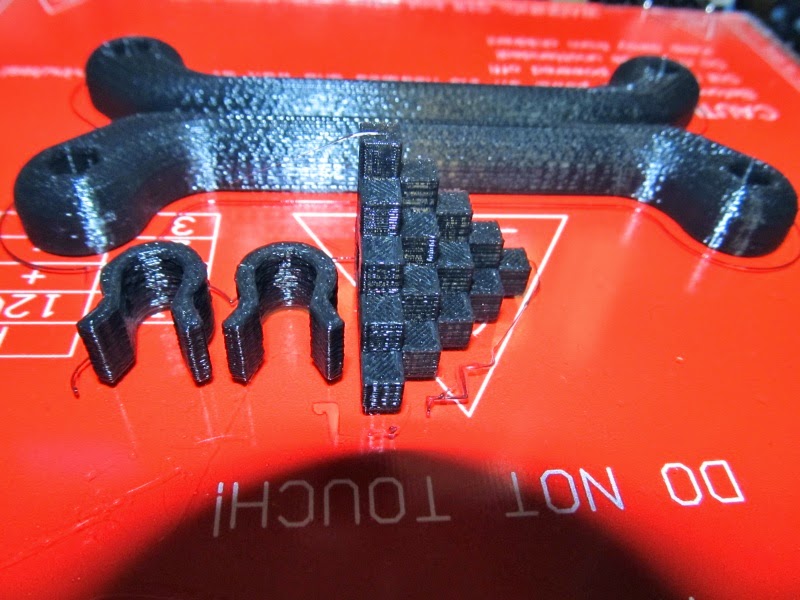
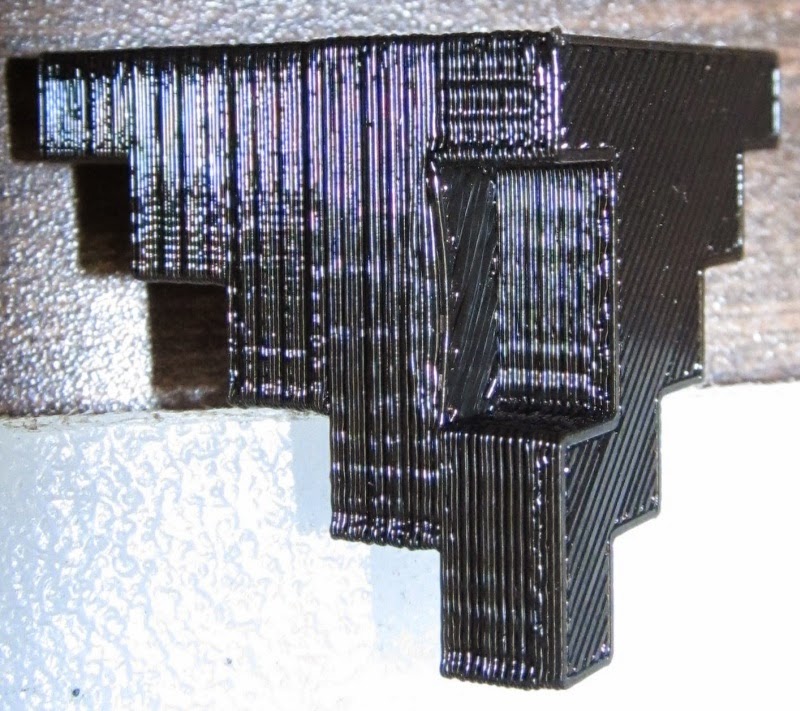
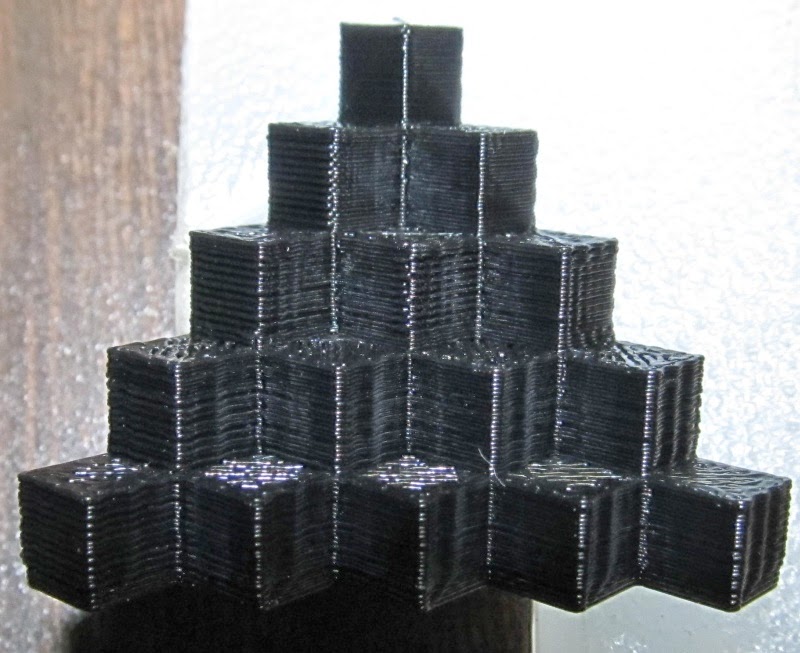
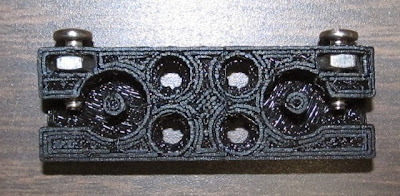
I could not find any belt clamps, or any nut blocks for sale, so I printed some I found on thingiverse, and this forum, I also printed a pair of couplers for the threaded rod.
I printed this Z-Axis coupler:
http://www.thingiverse.com/thing:19858
And the belt clamp I believe came from:
http://www.buildlog.net/forum/viewtopic.php?f=33&t=2157
Or
viewtopic.php?f=33&t=2157
This is what it looks like, I did not have the proper nuts and bolts, so I used a heat gun to soften the plastic and used 6-32 nuts and bolts.
And the nut blocks are from here I think:
https://www.thingiverse.com/thing:69812
I also printed this for my endstops:
Sainsmart / Makerslide X-Axis Mechanical End-stop Mount
https://www.thingiverse.com/thing:220149
Sainsmart / Makerslide Y-Axis mechanical end-stop
https://www.thingiverse.com/thing:231813
Sainsmart / Makerslide Z-Axis Mechanical End-stop Mount
https://www.thingiverse.com/thing:220145
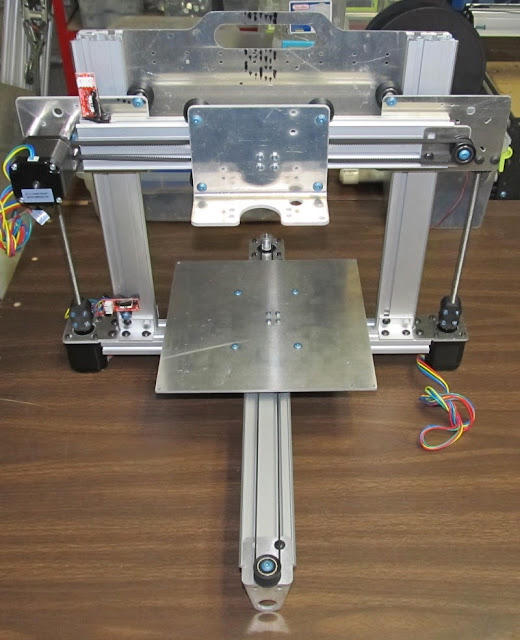
I used OpenBuilds Dual V Wheels and Pulleys in place of Makerslide V Wheels and Pulleys, and it looks like there is no problem in using them, I just used what spacers what came in the "OpenBuilds kit", seems to work just fine, I also used GT2 belt and Pulleys.
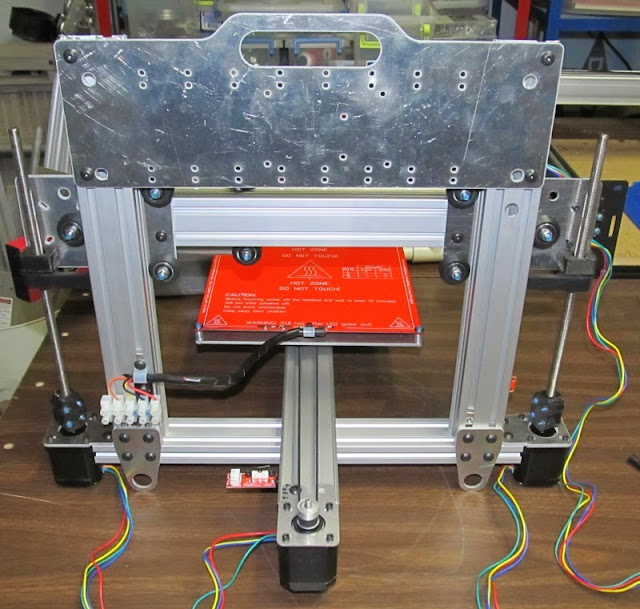
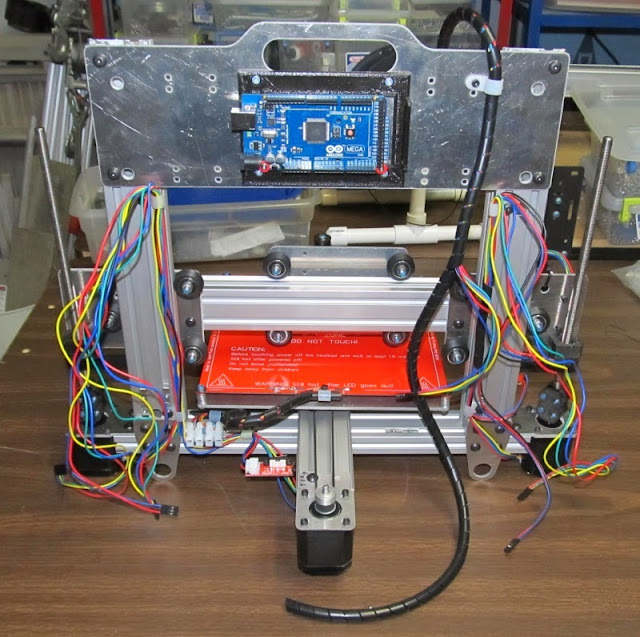
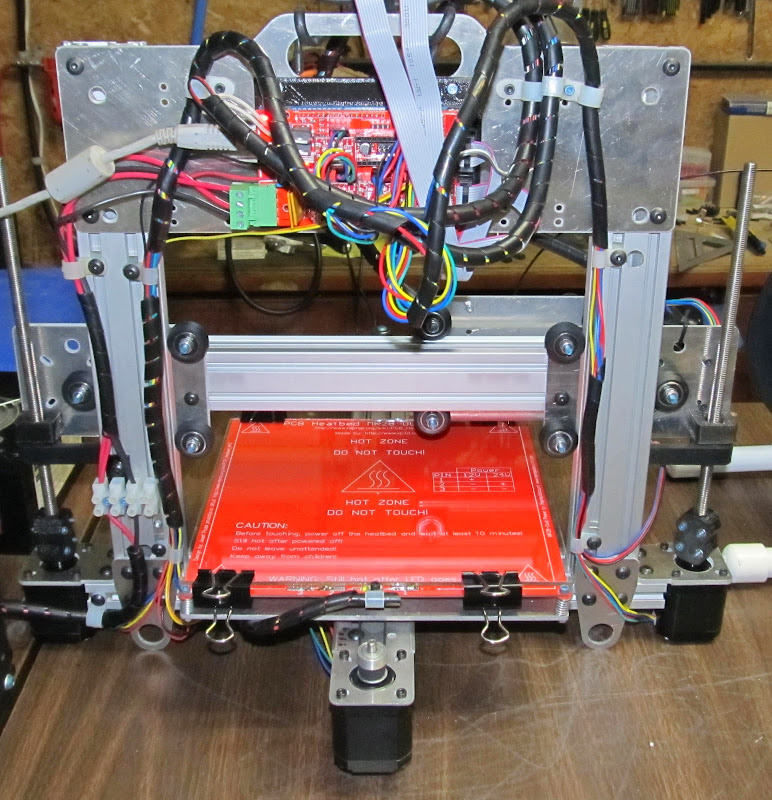
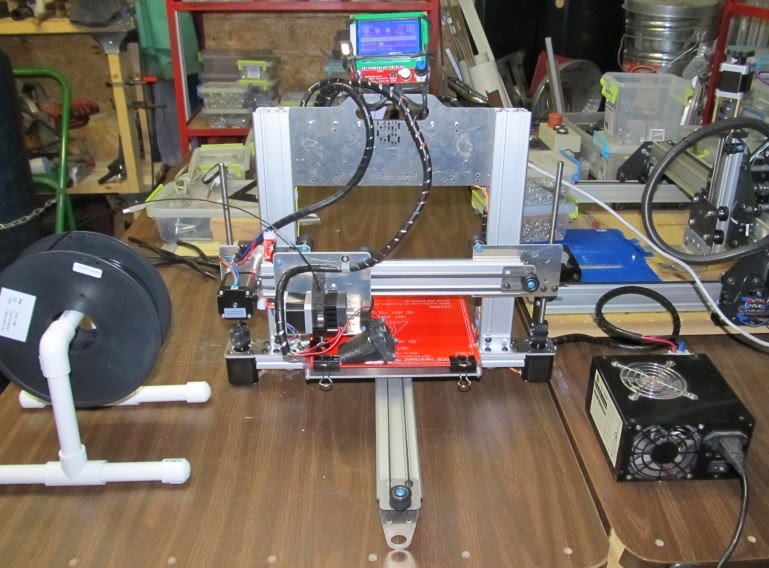
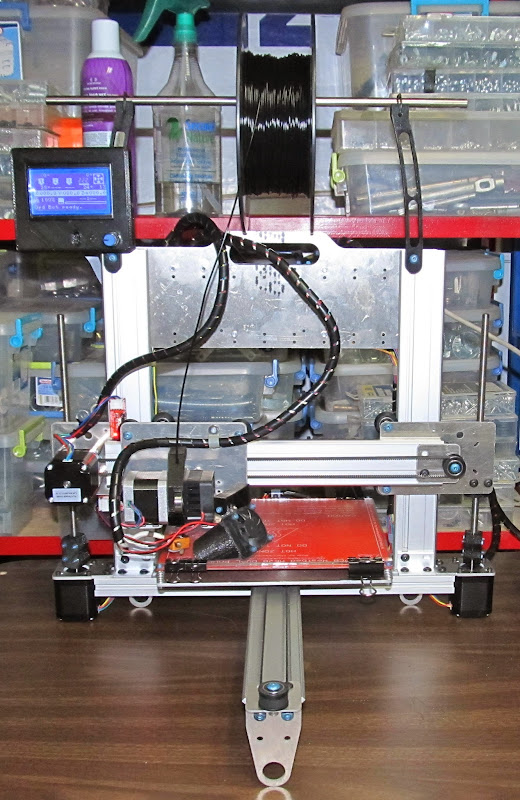
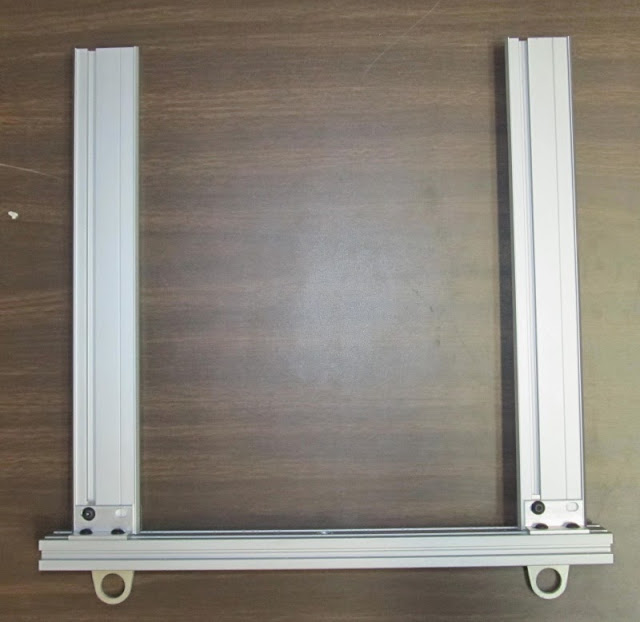
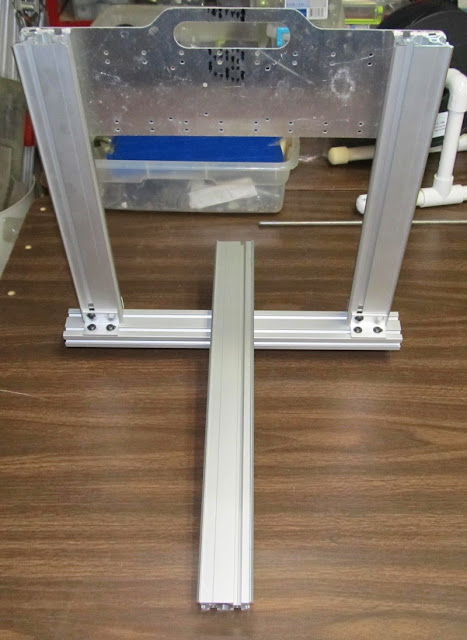
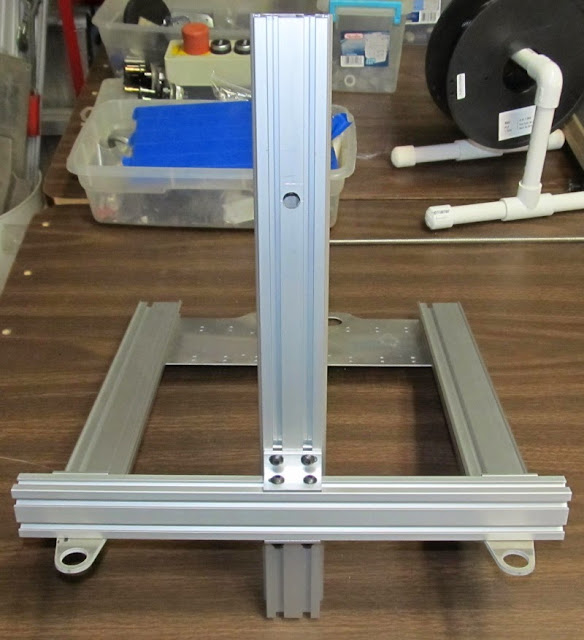
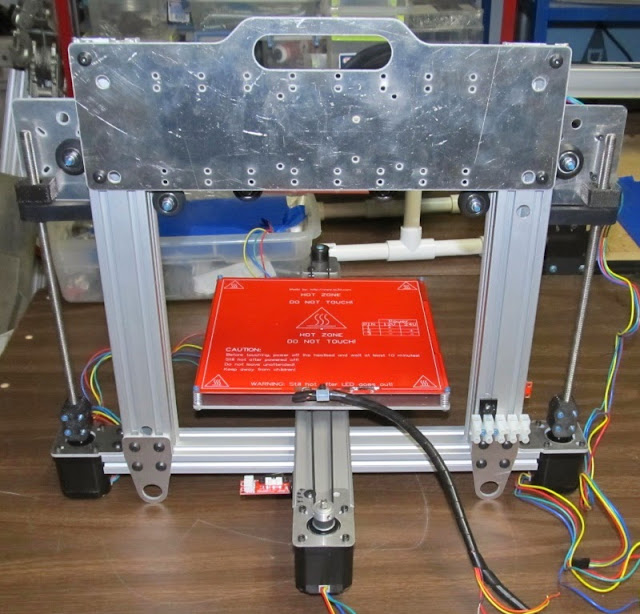
Images for the frame build:
LOL, I got one of the Makerslide rails upside down, but I don’t think its going to cause any problems.

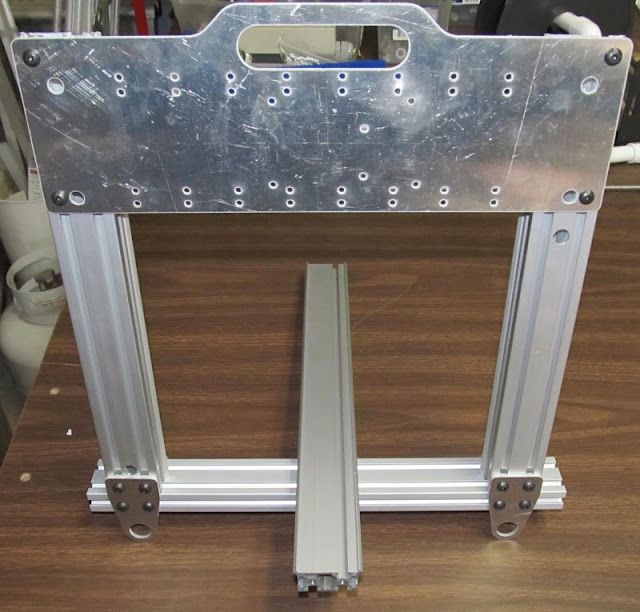
I had reversed the Makerslide when I drilled, so I made two holes.
I am trying to figure out my wiring strategy, at first I wanted to use the holes, but I tend to redo and change stuff a lot, so I thought that using the holes might lead to problems later.
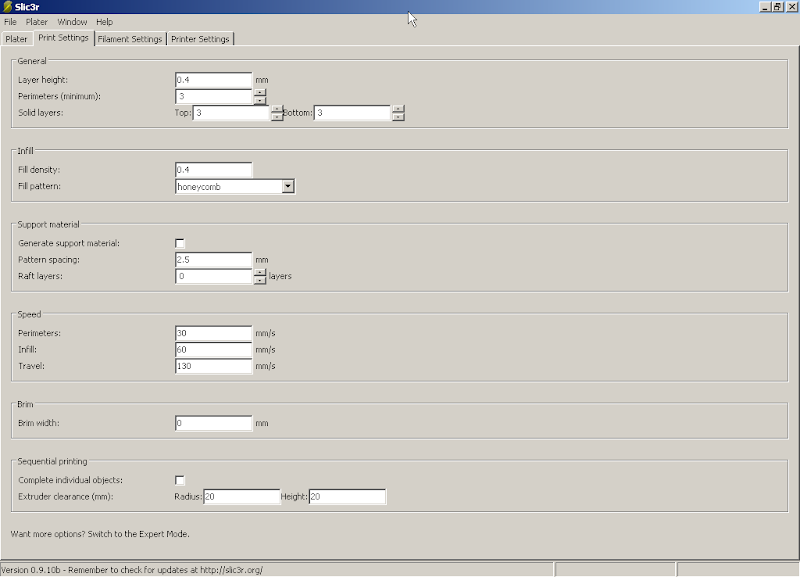
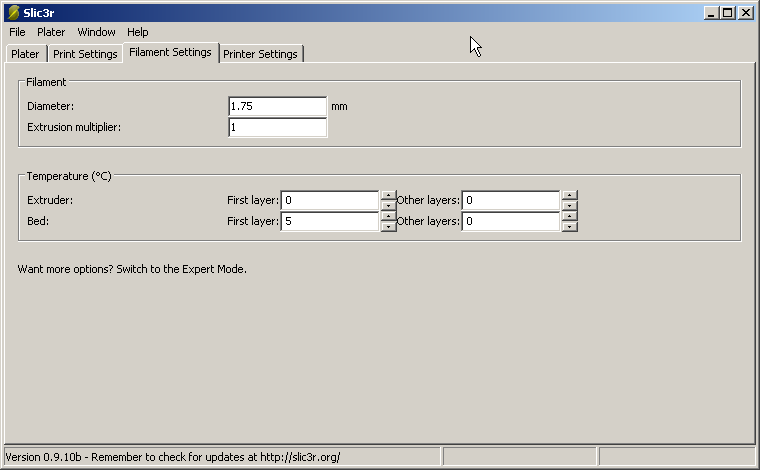
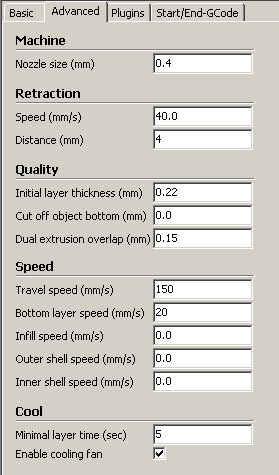
That's all I have done so far, I still need to setup Ramps, and program the Arduino Mega, I am not even sure were to start on the Arduino Mega, I am trying to figure out the Configuration.h stuff now.
From what I understand I need set this,
#define DEFAULT_AXIS_STEPS_PER_UNIT {80,80,2560,97.24160448}
I used this calculator
http://calculator.josefprusa.cz/#steppers
the settings are for GT2 belts and pulleys, and I did the extruder calibration with Mach3 and got 48.62080224 at 1/8 stepping, so at 1/16 it should be 97.24160448, I think.
Here is a helpful page on extruder calibration:
http://richrap.blogspot.com/2012/01/slic3r-is-nicer-part-1-settings-and.html
Still trying to figure out the end stop settings, and LCD setting for the Full Graphic Smart LCD Controller, and then how to use the Configuration.h, LOL
http://www.shapeoko.com/forum/viewtopic.php?f=5&t=2501&start=40
After trying 3D printing, I knew wanted a 3D printer, and because I had a lot of parts saved up for the Shapeoko 2 upgrades, I decided to make a Ord Bot.
Here are the parts I started with:
(004x)---NEMA17 Stepper Motor - KL17H248-15-4A ---- automationtechsinc.com
(003x)---Makerslide 330mm ------------------------------ automationtechsinc.com
(001x)---Makerslide 420mm ------------------------------ automationtechsinc.com
(001x)---Z Lift Plate Left and Right --------------------- automationtechsinc.com
(100x)---M3x0.5x4mm Socket Head Cap Screw -------- amazon.com * Had got for the Shapeoko 2.
(100x)---M3x0.5x6mm Socket Head Cap Screw -------- amazon.com * Had got for the Shapeoko 2.
(100x)---M3x0.5x45mm Socket Head Cap Screw ------ amazon.com * Used for Stepper Motor
(100x)---M5X0.80 Hex Lock Nut ------------------------- amazon.com * Had got for the Shapeoko 2.
(100x)---M5x0.8x6mm Button Head Cap Screw --------amazon.com * Had got for the Shapeoko 2.
(100x)---M5x0.8x8mm Button Head Cap Screw --------amazon.com * Had got for the Shapeoko 2.
(025x)---M5x0.8x12mm Button Head Cap Screw -------ebay.com * Had got for the Shapeoko 2.
(025x)---M5x0.8x30mm Button Head Cap Screw ------ ebay.com * Had got for the Shapeoko 2.
(001x)---M8x1.25x1000mm Threaded Rod ------------- ebay.com * I cut two 245mm sections from the 1000mm.
(200X)---Nuts For HFS5 Extrusions - HNKK5-5 --------- us.misumi-ec.com * Had got for the Shapeoko 2.
(001x)---HFS5-2040 1524mm Extrusion ---------------- us.misumi-ec.com * Cut to 370mm, had got for the Shapeoko 2.
(016x)---OpenBuilds Dual V Wheel Kit ----------------- openbuildspartstore.com * Had got for the Shapeoko 2.
(008x)---Eccentric Spacers ------------------------------ openbuildspartstore.com * Had got for the Shapeoko 2.
(002x)---Smooth Idler Pulley Kit ------------------------ openbuildspartstore.com * Had got for the Shapeoko 2.
(004x)---Universal L Brackets - Double ---------------- openbuildspartstore.com * Had got for the Shapeoko 2.
(004x)---Universal L Brackets - Single ----------------- openbuildspartstore.com * Had got for the Shapeoko 2.
(001x)---RioRand Heated set - MK2a, with glass------ amazon.com
(012x)---ACCO Binder Clips, Medium ------------------ amazon.com
(001x)---Ord Bot Hadron Build Plates ------------------ ebay.com
(001x)---RAMPS 1.4 kit, has Mega and drivers -------- ebay.com
(010x)---JST Connectors - M/F Pair - 4 Wire ---------- ebay.com
(008x)---Heatbed Leveling Springs --------------------- ebay.com
(001x)---MBE Extruder v9 - 12v heater ---------------- quintessentialuniversalbuildingdevice.com * Working well with mods.
(010x)---Aluminum Spacers 0.1250 inch -------------- inventables.com * Had got for the Shapeoko 2.
(020x)---Aluminum Spacers 0.2500 inch -------------- inventables.com * Had got for the Shapeoko 2.
(010x)---Aluminum Spacers 0.5000 inch -------------- inventables.com * Used for Stepper Motor, had got for the Shapeoko 2.
(020x)---Aluminum Spacers 1 inch -------------------- inventables.com * Used for Stepper Motor, had got for the Shapeoko 2.
(003x)---Mechanical End Stop v1.2 -------------------- ebay.com
(003x)---2m of GT2 belt with 2 GT2 Pulleys --------- ebay.com * used only about 4 foot, or 1.2 meters, had got for the Shapeoko 2.
I also decided to get this:
(001x)------Full Graphic Smart LCD Controller----------- ebay.com
I could not find any belt clamps, or any nut blocks for sale, so I printed some I found on thingiverse, and this forum, I also printed a pair of couplers for the threaded rod.
I printed this Z-Axis coupler:
http://www.thingiverse.com/thing:19858
And the belt clamp I believe came from:
http://www.buildlog.net/forum/viewtopic.php?f=33&t=2157
Or
viewtopic.php?f=33&t=2157
This is what it looks like, I did not have the proper nuts and bolts, so I used a heat gun to soften the plastic and used 6-32 nuts and bolts.
And the nut blocks are from here I think:
https://www.thingiverse.com/thing:69812
I also printed this for my endstops:
Sainsmart / Makerslide X-Axis Mechanical End-stop Mount
https://www.thingiverse.com/thing:220149
Sainsmart / Makerslide Y-Axis mechanical end-stop
https://www.thingiverse.com/thing:231813
Sainsmart / Makerslide Z-Axis Mechanical End-stop Mount
https://www.thingiverse.com/thing:220145
I used OpenBuilds Dual V Wheels and Pulleys in place of Makerslide V Wheels and Pulleys, and it looks like there is no problem in using them, I just used what spacers what came in the "OpenBuilds kit", seems to work just fine, I also used GT2 belt and Pulleys.
Images for the frame build:
LOL, I got one of the Makerslide rails upside down, but I don’t think its going to cause any problems.
I had reversed the Makerslide when I drilled, so I made two holes.
I am trying to figure out my wiring strategy, at first I wanted to use the holes, but I tend to redo and change stuff a lot, so I thought that using the holes might lead to problems later.
That's all I have done so far, I still need to setup Ramps, and program the Arduino Mega, I am not even sure were to start on the Arduino Mega, I am trying to figure out the Configuration.h stuff now.
From what I understand I need set this,
#define DEFAULT_AXIS_STEPS_PER_UNIT {80,80,2560,97.24160448}
I used this calculator
http://calculator.josefprusa.cz/#steppers
the settings are for GT2 belts and pulleys, and I did the extruder calibration with Mach3 and got 48.62080224 at 1/8 stepping, so at 1/16 it should be 97.24160448, I think.
Here is a helpful page on extruder calibration:
http://richrap.blogspot.com/2012/01/slic3r-is-nicer-part-1-settings-and.html
Still trying to figure out the end stop settings, and LCD setting for the Full Graphic Smart LCD Controller, and then how to use the Configuration.h, LOL