Coasty Update
Here is a quick update on Coasty. Several people have asked if I am releasing the source files or selling a kit. I am adjusting the design to make that more viable. The original version was made with parts I had laying about and not necessarily the best design choices for an open source project.
X Axis.

Originally I used an TR8-8 ACME thread lead screw. It was mounted to the motor by drilling a hole in the lead screw and epoxying it to the motor shaft. This worked well, but you needed a lathe to drill the hole and a special low backlash nut. The axis was also a little loud with and all metal design.
I changed to use a GT2 open belt cut to length. Belts and pulley are really easy to get and don’t cost too much.
Electronics

Need to shorten some wires after testing.
There were some issues with the EleksMaker electronics that I did not like. The laser circuit did not appear to have a pull down on the signal and it tended to fire if the Arduino was not pulling it low. This would happen during reboot and other scary times. The wiring was also quite a pain. There were no connectors for the limit switches so you had to directly solder to the Arduino Nano.
I changed to use a custom PCB that is the entire rear panel. This contains all of the circuits including the limit switches. Building a Coasty was a little like building a ship in a bottle. Now the bottle has no bottom and there are less parts inside.

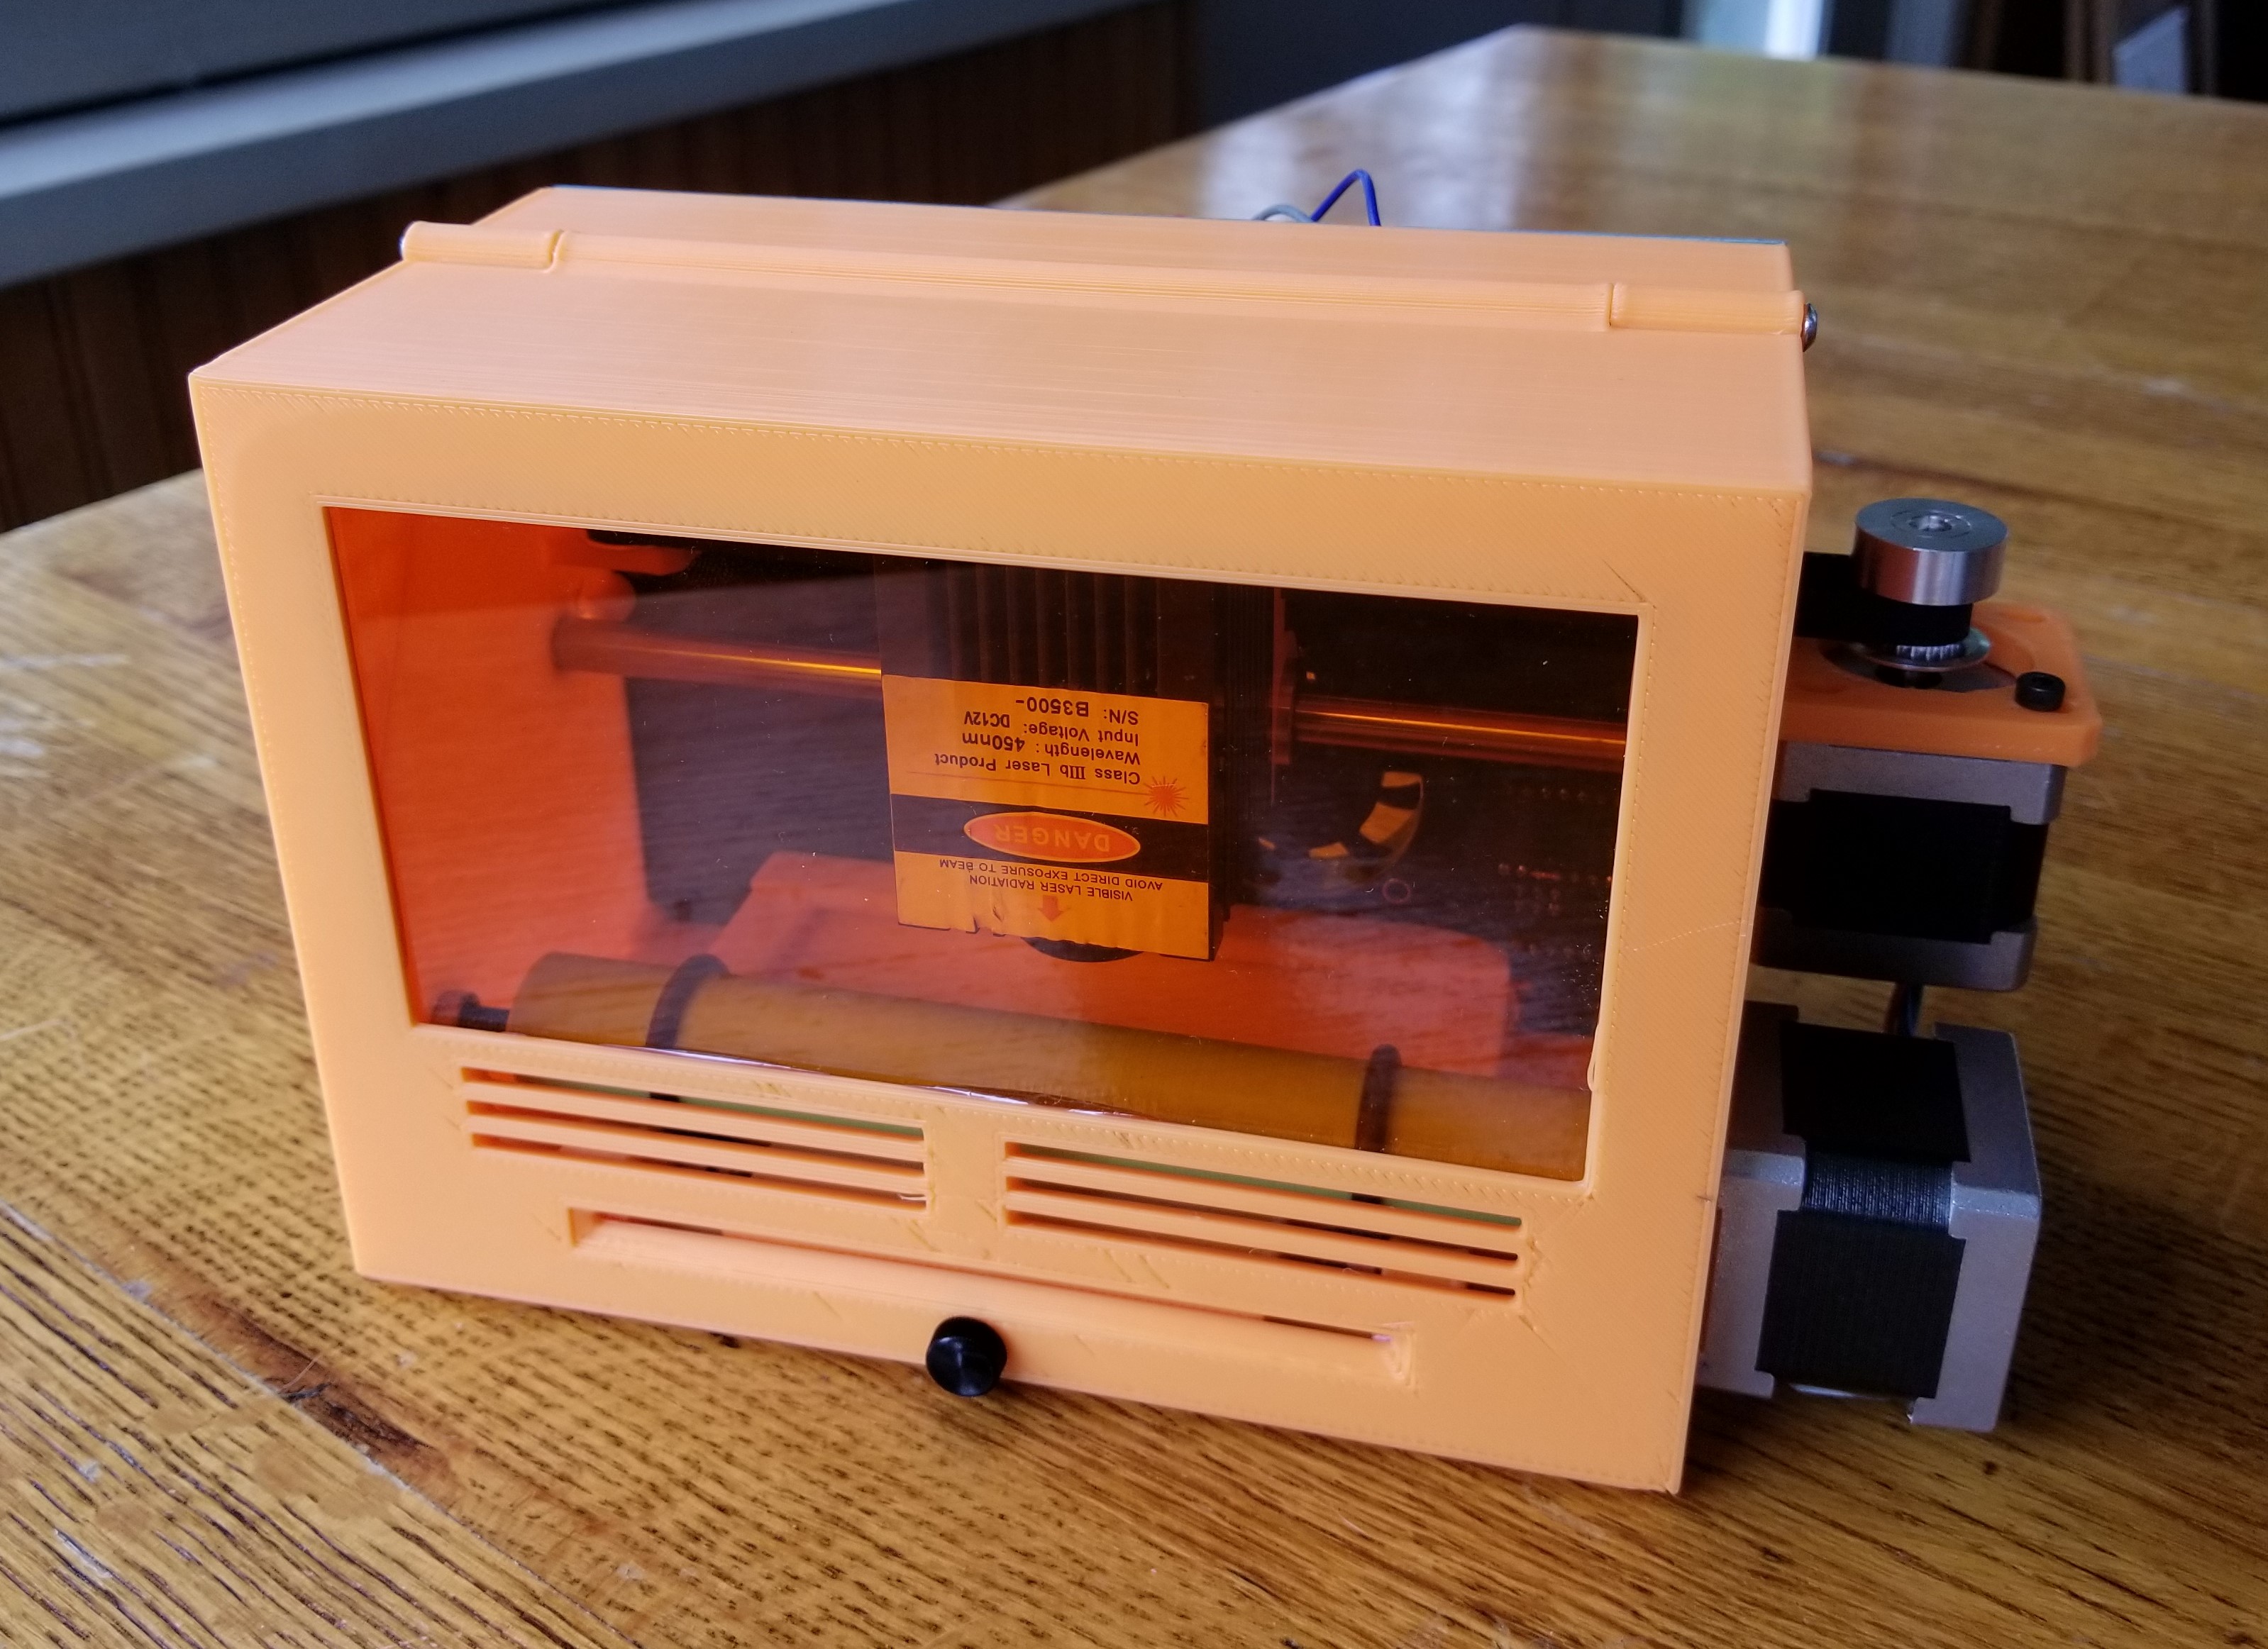
Front Door.
The front door now has a window. This makes the machine more fun to watch and no glasses are required.
Next Steps.
I have one build and am testing it for a while. If all goes well, I will release the source files and consider a kit.


Awesome little machine!
Where did you get the safety window material?
Tal,
I got the window from J Tech Photonics
https://jtechphotonics.com/?product=445nm-laser-shielding
This is amazing! Great work! 🙂 Please count me in as a kit customer. I would buy this from you right now if it were available for purchase.
I’m also fine buying a U.S. regionally-obtainable parts list. My only limitation is the circuit boards. I’m fine if it’s plug and play, but if I need to solder stuff, it quickly starts getting too complicated for my current fabrication skill level.
I might look at doing so kits soon. I do sell the fully assembled PCB I used for this project in case you want to start playing with some hardware.
https://www.tindie.com/products/33366583/penlaser-bot-controller/
Great! Thanks! One thing I forgot to mention is that I’d also be totally open to a parts pack only, where I would have to supply my own 3D-printed case from your design files. I have access to a printer, and since the assembled PCB is already available, the rest sounds pretty simple: buy the parts and follow build/config instructions. Yes?
Coasty would be incredibly valuable to me in some rapid prototyping I’m doing using the same materials. I sincerely don’t mean to bother you, but if possible, I’d love to get a head start by ordering the various core mechanics ahead of time. Might it be possible to get even a partial updated parts list while you’re working out the kit offering?